レーティング用のUI素材を作成しました。
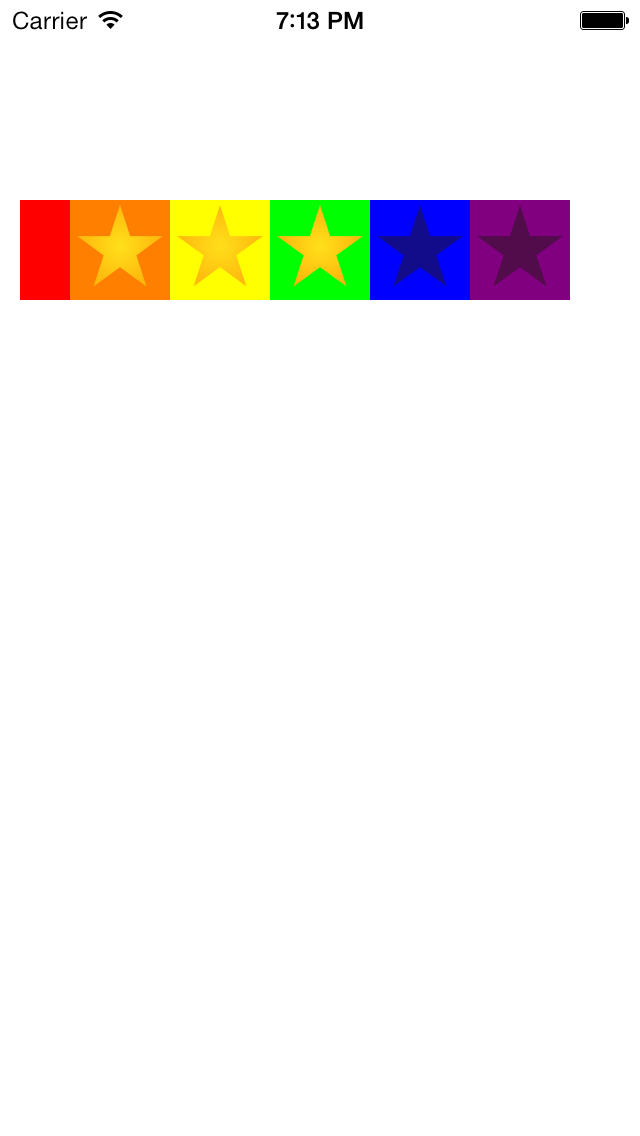
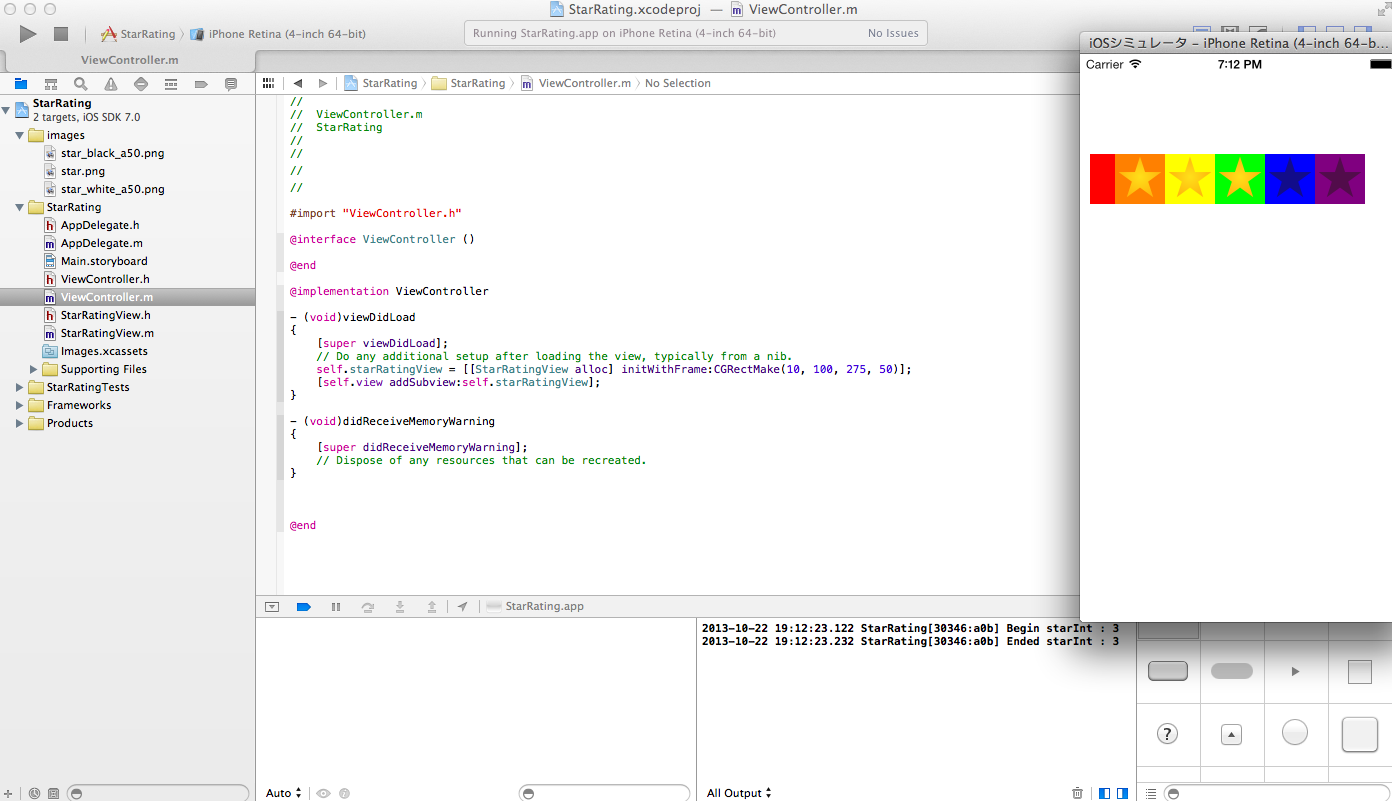
5つ並んだ星をタッチして、AppStoreのレビューのように0~5の値を入出力できるUI用のパーツです。わかりやすくするよう、星ひとつひとつの背景色に色をつけてあります。また、一番端の赤い領域に触れると、星を0として入力できます。
Githubにサンプルコード置きました。
こちらがUIViewのサブクラスStarRatingViewの本体。
StarRatingView.h
[objc]
#import <UIKit/UIKit.h>
@interface StarRatingView : UIView{
UIView * zeroView;
UIImageView * firstStarView;
UIImageView * secondStarView;
UIImageView * thirdStarView;
UIImageView * fourthStarView;
UIImageView * fifthStarView;
}
@property(nonatomic) int starValue;
@property(strong, nonatomic) UIImage * starImage;
@property(strong, nonatomic) UIImage * darkStarImage;
@end
[/objc]
StarRatingView.m
[objc]
#import "StarRatingView.h"
#define STAR_WIDTH(width) width / 5.5
#define FIRST_STAR_X(width) width / 11
#define SECOND_STAR_X(width) (3 * width) /11
#define THIRD_STAR_X(width) (5 * width) /11
#define FOURTH_STAR_X(width) (7 * width) /11
#define FIFTH_STAR_X(width) (9 * width) /11
@implementation StarRatingView
– (id)initWithFrame:(CGRect)frame
{
self = [super initWithFrame:frame];
if (self) {
// Initialization code
// 初期値
self.starValue = 0;
// タッチができるようにする
self.userInteractionEnabled = YES;
// 星用のimageViewを作成
zeroView = [[UIView alloc] initWithFrame:CGRectMake(0, 0, STAR_WIDTH(self.frame.size.width), self.frame.size.height)];
firstStarView = [[UIImageView alloc] initWithFrame:CGRectMake(FIRST_STAR_X(self.frame.size.width), 0, STAR_WIDTH(self.frame.size.width), self.frame.size.height)];
secondStarView = [[UIImageView alloc] initWithFrame:CGRectMake(SECOND_STAR_X(self.frame.size.width), 0, STAR_WIDTH(self.frame.size.width), self.frame.size.height)];
thirdStarView = [[UIImageView alloc] initWithFrame:CGRectMake(THIRD_STAR_X(self.frame.size.width), 0, STAR_WIDTH(self.frame.size.width), self.frame.size.height)];
fourthStarView = [[UIImageView alloc] initWithFrame:CGRectMake(FOURTH_STAR_X(self.frame.size.width), 0, STAR_WIDTH(self.frame.size.width), self.frame.size.height)];
fifthStarView = [[UIImageView alloc] initWithFrame:CGRectMake(FIFTH_STAR_X(self.frame.size.width), 0, STAR_WIDTH(self.frame.size.width), self.frame.size.height)];
// 星を作成
self.starImage = [UIImage imageNamed:@"star.png"];
self.darkStarImage = [UIImage imageNamed:@"star_black_a50.png"];
// 画像を指定
firstStarView.image = self.darkStarImage;
secondStarView.image = self.darkStarImage;
thirdStarView.image = self.darkStarImage;
fourthStarView.image = self.darkStarImage;
fifthStarView.image = self.darkStarImage;
// viewに追加
[self addSubview:zeroView];
[self addSubview:firstStarView];
[self addSubview:secondStarView];
[self addSubview:thirdStarView];
[self addSubview:fourthStarView];
[self addSubview:fifthStarView];
// 背景色を変更
zeroView.backgroundColor = [UIColor redColor];
firstStarView.backgroundColor = [UIColor orangeColor];
secondStarView.backgroundColor = [UIColor yellowColor];
thirdStarView.backgroundColor = [UIColor greenColor];
fourthStarView.backgroundColor = [UIColor blueColor];
fifthStarView.backgroundColor = [UIColor purpleColor];
self.backgroundColor = [UIColor grayColor];
}
return self;
}
/*
// Only override drawRect: if you perform custom drawing.
// An empty implementation adversely affects performance during animation.
– (void)drawRect:(CGRect)rect
{
// Drawing code
}
*/
// タッチ開始
– (void)touchesBegan:(NSSet *)touches withEvent:(UIEvent *)event
{
UITouch *touch = [touches anyObject];
CGPoint location = [touch locationInView:self];
//NSLog(@"Began x:%f y:%f", location.x, location.y);
int starInt = [self calculateTouchLocation:location.x];
NSLog(@"Begin starInt : %d", starInt);
[self showStar:starInt];
self.starValue = starInt;
}
// タッチ移動
– (void)touchesMoved:(NSSet *)touches withEvent:(UIEvent *)event
{
UITouch *touch = [touches anyObject];
CGPoint location = [touch locationInView:self];
//NSLog(@"Moved x:%f y:%f", location.x, location.y);
int starInt = [self calculateTouchLocation:location.x];
//NSLog(@"Moved starInt : %d", starInt);
[self showStar:starInt];
self.starValue = starInt;
}
// タッチ終了
– (void)touchesEnded:(NSSet *)touches withEvent:(UIEvent *)event
{
UITouch *touch = [touches anyObject];
CGPoint location = [touch locationInView:self];
//NSLog(@"Ended x:%f y:%f", location.x, location.y);
int starInt = [self calculateTouchLocation:location.x];
NSLog(@"Ended starInt : %d", starInt);
[self showStar:starInt];
self.starValue = starInt;
}
// 座標を0~5の数値に変換
-(int)calculateTouchLocation:(double)locationX
{
int starInt = 0;
if (locationX < FIRST_STAR_X(self.frame.size.width)) {
starInt = 0;
}else if (locationX >= FIRST_STAR_X(self.frame.size.width) && locationX < SECOND_STAR_X(self.frame.size.width)){
starInt = 1;
}else if (locationX >= SECOND_STAR_X(self.frame.size.width) && locationX < THIRD_STAR_X(self.frame.size.width)){
starInt = 2;
}else if (locationX >= THIRD_STAR_X(self.frame.size.width) && locationX < FOURTH_STAR_X(self.frame.size.width)){
starInt = 3;
}else if (locationX >= FOURTH_STAR_X(self.frame.size.width) && locationX < FIFTH_STAR_X(self.frame.size.width)){
starInt = 4;
}else if (locationX >= FIFTH_STAR_X(self.frame.size.width)){
starInt = 5;
}else{
starInt = 0;
}
return starInt;
}
-(void)showStar:(int)value{
switch (value) {
case 0:
firstStarView.image = self.darkStarImage;
secondStarView.image = self.darkStarImage;
thirdStarView.image = self.darkStarImage;
fourthStarView.image = self.darkStarImage;
fifthStarView.image = self.darkStarImage;
break;
case 1:
firstStarView.image = self.starImage;
secondStarView.image = self.darkStarImage;
thirdStarView.image = self.darkStarImage;
fourthStarView.image = self.darkStarImage;
fifthStarView.image = self.darkStarImage;
break;
case 2:
firstStarView.image = self.starImage;
secondStarView.image = self.starImage;
thirdStarView.image = self.darkStarImage;
fourthStarView.image = self.darkStarImage;
fifthStarView.image = self.darkStarImage;
break;
case 3:
firstStarView.image = self.starImage;
secondStarView.image = self.starImage;
thirdStarView.image = self.starImage;
fourthStarView.image = self.darkStarImage;
fifthStarView.image = self.darkStarImage;
break;
case 4:
firstStarView.image = self.starImage;
secondStarView.image = self.starImage;
thirdStarView.image = self.starImage;
fourthStarView.image = self.starImage;
fifthStarView.image = self.darkStarImage;
break;
case 5:
firstStarView.image = self.starImage;
secondStarView.image = self.starImage;
thirdStarView.image = self.starImage;
fourthStarView.image = self.starImage;
fifthStarView.image = self.starImage;
break;
default:
firstStarView.image = self.darkStarImage;
secondStarView.image = self.darkStarImage;
thirdStarView.image = self.darkStarImage;
fourthStarView.image = self.darkStarImage;
fifthStarView.image = self.darkStarImage;
break;
}
}
@end
[/objc]
設置方法
実装するときはStarRatingViewオブジェクトをaddSubViewすれば設置できます。
viewControllerなどにこんなかんじで設置します。
[objc]
StarRatingView *starRatingView = [[StarRatingView alloc] initWithFrame:CGRectMake(10, 100, 275, 50)];
[self.view addSubview:self.starRatingView];
[/objc]
値を出し入れするときは、「starRatingView.starValue」からアクセスします。
Githubにサンプルコード置きました。


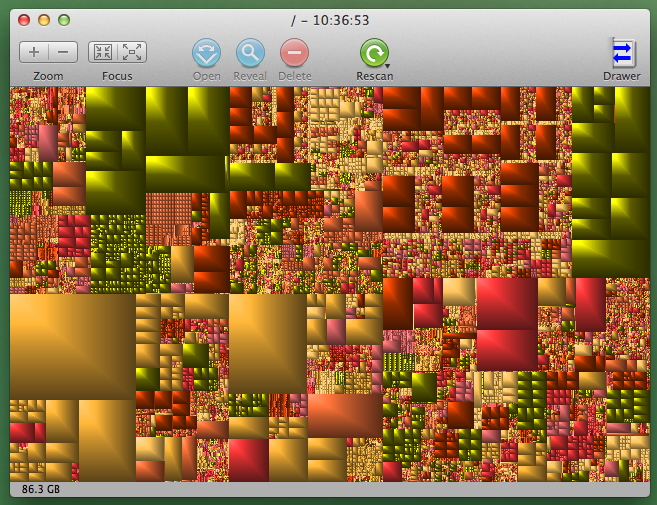
 ちなみにどのファイルやディレクトリが容量が大きいか、というのは、GrandPerspectiveというフリーソフトを使いました。